htmlやcssでコーディングする際、フレックスボックスというレイアウトの方法を使う機会が多いかと思います。
フレックスボックスはさまざまな便利なオプションを使用することができますよね。
しかしオプションが多すぎるあまり、
「flex-flowって聞いたことあるけど何ができるの?」
「フレックスボックスのcssを簡潔に記述したい」
このように悩む方もいらっしゃるのではないでしょうか。
そこで今回は、フレックスボックスのオプションのひとつである「flex-flow」の
・基本的な使い方
・「flex-direction」との違い
などを解説します。
目次
flex-flowとは
flex-flowの読み方
flex-flowは「フレックスフロー」と読み、フレックスボックスの「流れ」や「流動」といったことを意味します。
読み方だけ見ても、イマイチどういった使い方をするのかピンときませんね。
これから、詳しく解説していきます。
flex-flowの説明
「flex-flow」は、「flex-direction」と「flex-wrap」の2つのプロパティを一括にまとめることができるプロパティです。
たとえば、
|
1 2 3 4 5 6 |
/* -- css -- */ .sample{ flex-direction: row; flex-wrap: wrap; } |
このような記述があった場合、以下のように書き換えることができます。
|
1 2 3 4 5 |
/* -- css -- */ .sample{ flex-flow: row wrap; } |
非常に簡潔になりましたね。
このように便利なだけでなく、cssもすっきりと簡潔に書くことができますので、この機会にぜひマスターしましょう!
flex-flowで利用できる値
flex-flowでは以下の値を使うことができます。
| 値 | 説明 |
|---|---|
| flex-directionの値 | 「row(初期値)」「row-reverse」「column」「column-reverse」 |
| flex-wrapの値 | 「nowrap(初期値)」「wrap」「wrap-reverse」 |
対応ブラウザ
対応ブラウザは以下の通りです。
| PC用ブラウザ | 対応状況 |
|---|---|
| Chrome | 完全対応 |
| Edge | 完全対応 |
| Firefox | 完全対応 |
| nternet Explorer | 完全対応 |
| Opera | 完全対応 |
| Safari | 完全対応 |
| スマートフォン用ブラウザ | 対応状況 |
| Android webview | 完全対応 |
| Android版Chrome | 完全対応 |
| Android版Firefox | 完全対応 |
| Android 版 Opera | 完全対応 |
| iOS版Safari | 完全対応 |
| Samsung Internet | 完全対応 |
flex-flowの基本的な使い方
flex-flowの使い方
それでは「flex-flow」の使い方を具体的に解説します。
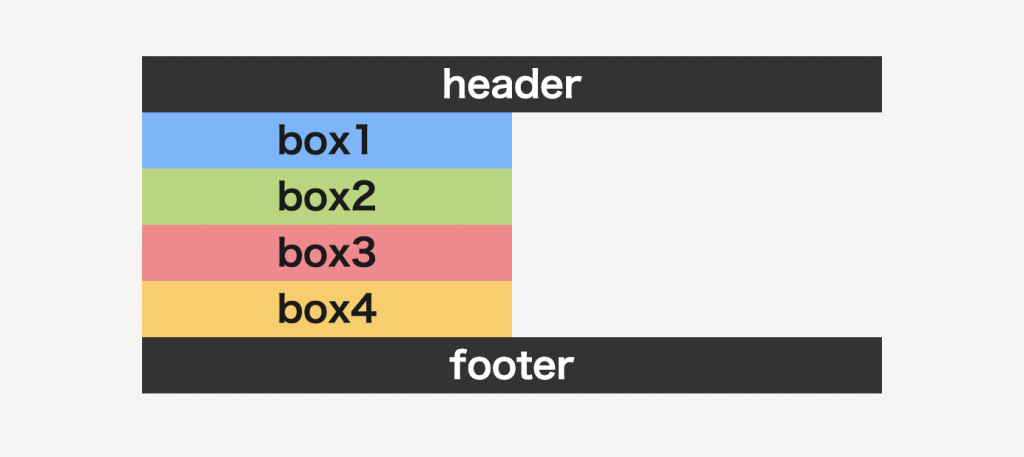
以下のように、headerに対して半分の幅をもった4つのボックスを用意しました。まずは、これらのボックスをフレックスボックスを使ってレイアウトを変更してみましょう。
|
1 2 3 4 5 6 7 8 9 10 11 12 13 14 15 16 17 18 19 20 21 22 23 24 25 |
/* -- html -- */ <header>header</header> <div class="flexbox"> <div class="box1"> <p>box1</p> </div> <div class="box2"> <p>box2</p> </div> <div class="box3"> <p>box3</p> </div> <div class="box4"> <p>box4</p> </div> </div> <footer>footer</footer> |
|
1 2 3 4 5 6 7 |
/* -- css -- */ .box1,.box2,.box3,.box4{width: 50%;} .box1{background: #6fb5ff;} .box2{background: #b3d874;} .box3{background: #ff838b;} .box4{background: #ffce5b;} |
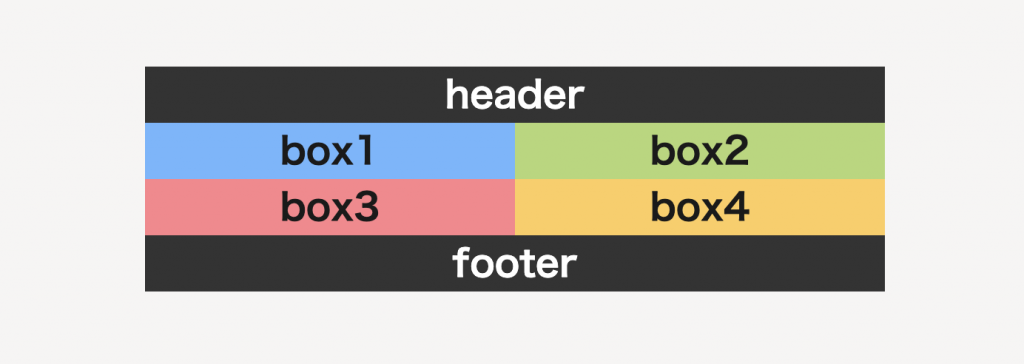
「flex-direction」の値は「row」、「flex-wrap」の値は「wrap」で指定してみましょう。
|
1 2 3 4 5 6 7 8 9 10 11 12 13 14 15 16 17 18 19 20 21 22 23 24 25 |
/* -- html -- */ <header>header</header> <div class="flexbox"> <div class="box1"> <p>box1</p> </div> <div class="box2"> <p>box2</p> </div> <div class="box3"> <p>box3</p> </div> <div class="box4"> <p>box4</p> </div> </div> <footer>footer</footer> |
|
1 2 3 4 5 6 7 8 9 10 11 12 13 14 |
/* -- css -- */ .box1,.box2,.box3,.box4{width: 50%;} .box1{background: #6fb5ff;} .box2{background: #b3d874;} .box3{background: #ff838b;} .box4{background: #ffce5b;} .flexbox{ display: flex; flex-direction: row; flex-wrap: wrap; } |
キレイに横並びになり、折り返されていることがわかりますね。それでは次に、「flex-flow」を使って、先ほどのコードを書き換えてみましょう。
|
1 2 3 4 5 6 7 8 9 10 11 12 13 14 15 16 17 18 19 20 21 22 23 24 25 |
/* -- html -- */ <header>header</header> <div class="flexbox"> <div class="box1"> <p>box1</p> </div> <div class="box2"> <p>box2</p> </div> <div class="box3"> <p>box3</p> </div> <div class="box4"> <p>box4</p> </div> </div> <footer>footer</footer> |
|
1 2 3 4 5 6 7 8 9 10 11 12 13 |
/* -- css -- */ .box1,.box2,.box3,.box4{width: 50%;} .box1{background: #6fb5ff;} .box2{background: #b3d874;} .box3{background: #ff838b;} .box4{background: #ffce5b;} .flexbox{ display: flex; flex-flow: row wrap; } |
書き換えても、きちんと同じ結果を得ることができましたね。念のため、ほかの値も見てみましょう。
|
1 2 3 4 5 6 7 8 9 10 11 12 13 14 15 16 17 18 19 20 21 22 23 24 25 |
/* -- html -- */ <header>header</header> <div class="flexbox"> <div class="box1"> <p>box1</p> </div> <div class="box2"> <p>box2</p> </div> <div class="box3"> <p>box3</p> </div> <div class="box4"> <p>box4</p> </div> </div> <footer>footer</footer> |
|
1 2 3 4 5 6 7 8 9 10 11 12 13 |
/* -- css -- */ .box1,.box2,.box3,.box4{width: 50%;} .box1{background: #6fb5ff;} .box2{background: #b3d874;} .box3{background: #ff838b;} .box4{background: #ffce5b;} .flexbox{ display: flex; flex-flow: row nowrap; } |
「flex-wrap」の値を「nowrap」に変更したため、折り返しがなくなり、横にキレイに並んでいますね。
このように、「flex-flow」は簡単に使うことができ、コードも簡潔にすることができるプロパティとなっています。
flex-flowと類似する要素との違い
これまで解説してきた通り、「flex-flow」は、
・flex-direction
・flex-wrap
この2つのプロパティの値のみ有効なものになります。ほかのプロパティとごちゃごちゃになって間違った値を入れてしまわないように注意しましょう。
flex-flowの応用的な使い方
先ほどのサンプルコードを用いて、ほかの値も見ていきましょう。
|
1 2 3 4 5 6 7 8 9 10 11 12 13 14 15 16 17 18 19 20 21 22 23 24 25 |
/* -- html -- */ <header>header</header> <div class="flexbox"> <div class="box1"> <p>box1</p> </div> <div class="box2"> <p>box2</p> </div> <div class="box3"> <p>box3</p> </div> <div class="box4"> <p>box4</p> </div> </div> <footer>footer</footer> |
|
1 2 3 4 5 6 7 8 9 10 11 12 13 |
/* -- css -- */ .box1,.box2,.box3,.box4{width: 50%;} .box1{background: #6fb5ff;} .box2{background: #b3d874;} .box3{background: #ff838b;} .box4{background: #ffce5b;} .flexbox{ display: flex; flex-flow: row-reverse nowrap; } |
「flex-direction」の値に「row-reverse」を使うことで、「横並びの逆方向」にレイアウトを変えることができます。
|
1 2 3 4 5 6 7 8 9 10 11 12 13 14 15 16 17 18 19 20 21 22 23 24 25 |
/* -- html -- */ <header>header</header> <div class="flexbox"> <div class="box1"> <p>box1</p> </div> <div class="box2"> <p>box2</p> </div> <div class="box3"> <p>box3</p> </div> <div class="box4"> <p>box4</p> </div> </div> <footer>footer</footer> |
|
1 2 3 4 5 6 7 8 9 10 11 12 13 |
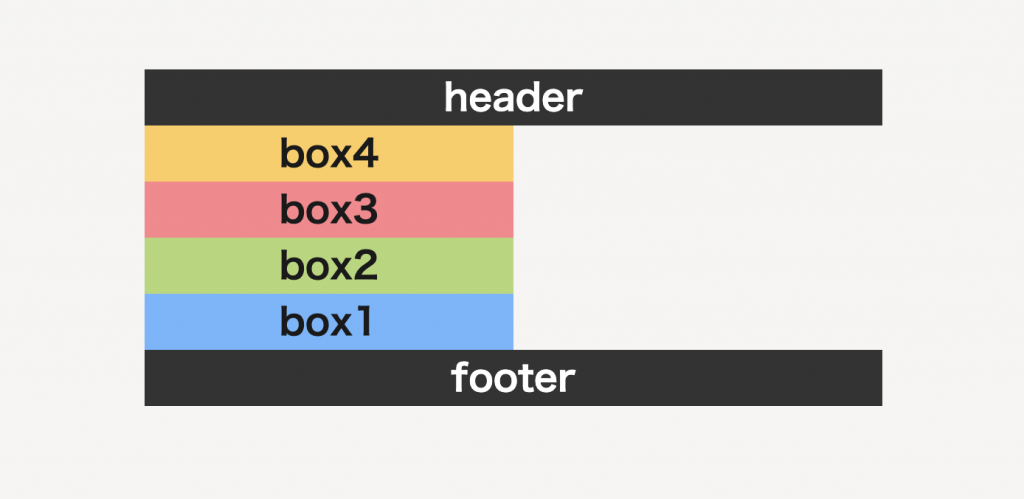
/* -- css -- */ .box1,.box2,.box3,.box4{width: 50%;} .box1{background: #6fb5ff;} .box2{background: #b3d874;} .box3{background: #ff838b;} .box4{background: #ffce5b;} .flexbox{ display: flex; flex-flow: column-reverse nowrap; } |
「column-reverse」を使うと、「縦並びの逆方向」を再現することができます。フレックスボックスを使うと、色々なレイアウトを実装できて非常に便利ですね。
まとめ
いかがでしたか?
今回は、「flex-flowの使い方」を解説してきました。
ぜひ参考にしていただいて、コードをすっきりと簡潔にし、効率よくコーディングしてみてくださいね。
最後まで読んでいただきありがとうございました。


