htmlやcssでコーディングしていると、フレックスボックスを使う機会が多いかと思います。
そんなフレックスボックスのなかのひとつである「order」プロパティをご存知ですか?
「orderって聞いたことるけどよくわからない……」
「フレックスボックスを使って、もっと色んなレイアウトを組みたい!」
このように悩んでいる方に向けて、今回は「order」の
について解説します。
目次
orderとは
orderの読み方
「order」は「オーダー」と読みます。
「オーダー」と聞くと、飲食店などでメニューを「注文する」ような意味合いのイメージがありますよね。
しかし、それとは少しだけニュアンスが違いますので、これから解説していきますね。
orderの説明
フレックスボックスは、要素を囲っている大枠である親要素の「フレックスコンテナ」と、フレックスコンテナのなかにある一つ一つの要素の「フレックスアイテム」に分類されます。
そしてフレックスアイテムは基本的に、上から下へ、もしくは左から右へと配置されていきますよね。
そんなフレックスアイテムの並び順を自由に入れ替えることができるのが「order」です。
これから、サンプルコードを用いて詳しく解説していきます。
orderで利用できる値
orderでは以下の属性を使うことができます。
| 値 | 説明 |
|---|---|
| 初期値 | 0 |
| 指定値 | 整数 |
対応ブラウザ
対応ブラウザは以下の通りです。
| PC用ブラウザ | 対応状況 |
|---|---|
| Chrome | 完全対応 |
| Edge | 完全対応 |
| Firefox | 完全対応 |
| nternet Explorer | 完全対応 |
| Opera | 完全対応 |
| Safari | 完全対応 |
| スマートフォン用ブラウザ | 対応状況 |
| Android webview | 完全対応 |
| Android版Chrome | 完全対応 |
| Android版Firefox | 完全対応 |
| Android 版 Opera | 完全対応 |
| iOS版Safari | 完全対応 |
| Samsung Internet | 完全対応 |
orderの基本的な使い方
orderの使い方
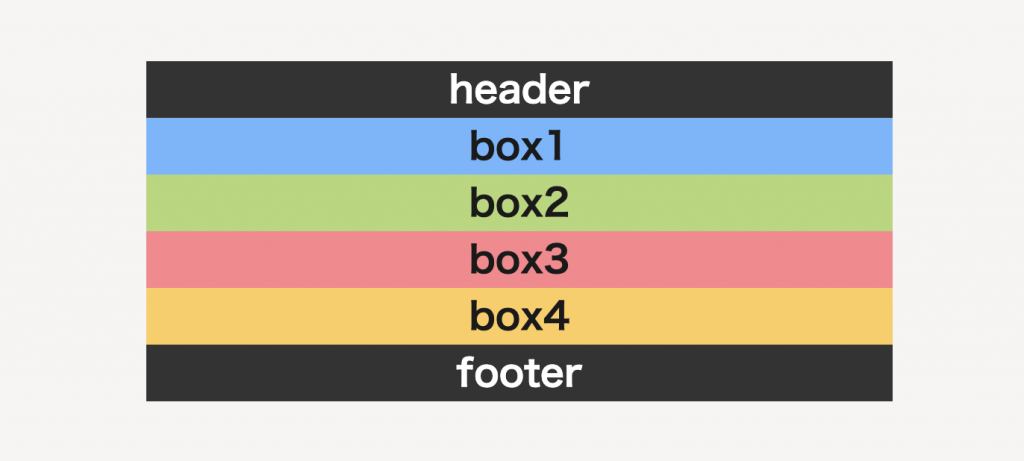
サンプルとして、以下のような4つのボックスを用意しました。
|
1 2 3 4 5 6 7 8 9 10 11 12 13 14 15 16 17 18 19 20 21 22 23 24 25 |
/* -- html -- */ <header>header</header> <div class="flexbox"> <div class="box1"> <p>box1</p> </div> <div class="box2"> <p>box2</p> </div> <div class="box3"> <p>box3</p> </div> <div class="box4"> <p>box4</p> </div> </div> <footer>footer</footer> |
|
1 2 3 4 5 6 7 |
/* -- css -- */ .box1,.box2,.box3,.box4{width: 100%;} .box1{background: #6fb5ff;} .box2{background: #b3d874;} .box3{background: #ff838b;} .box4{background: #ffce5b;} |
まずは、この4つのボックスをフレックスボックスを使って横並びにしてみましょう。
|
1 2 3 4 5 6 7 8 9 10 11 12 13 14 15 16 17 18 19 20 21 22 23 24 25 |
/* -- html -- */ <header>header</header> <div class="flexbox"> <div class="box1"> <p>box1</p> </div> <div class="box2"> <p>box2</p> </div> <div class="box3"> <p>box3</p> </div> <div class="box4"> <p>box4</p> </div> </div> <footer>footer</footer> |
|
1 2 3 4 5 6 7 8 9 10 11 |
/* -- css -- */ .box1,.box2,.box3,.box4{width: 100%;} .box1{background: #6fb5ff;} .box2{background: #b3d874;} .box3{background: #ff838b;} .box4{background: #ffce5b;} .flexbox{ display: flex; } |
キレイに横並びになりましたね。それではここで、「order」を使ってフレックスアイテムの順番を入れ替えてみましょう。
|
1 2 3 4 5 6 7 8 9 10 11 12 13 14 15 16 17 18 19 20 21 22 23 24 25 |
/* -- html -- */ <header>header</header> <div class="flexbox"> <div class="box1"> <p>box1</p> </div> <div class="box2"> <p>box2</p> </div> <div class="box3"> <p>box3</p> </div> <div class="box4"> <p>box4</p> </div> </div> <footer>footer</footer> |
|
1 2 3 4 5 6 7 8 9 10 11 |
/* -- css -- */ .box1,.box2,.box3,.box4{width: 100%;} .box1{background: #6fb5ff; order: 2;} .box2{background: #b3d874;} .box3{background: #ff838b;} .box4{background: #ffce5b;} .flexbox{ display: flex; } |
「box1」に対して「order: 2;」と指定しました。しかし、「box1」は2番目に配置されたわけではなく、1番後ろにきてしまいましたね。
これは、以下の2つが理由になります。
・「order」の値が小さいものから順番に配置されること
わかりやすくコードにしてみると、
|
1 2 3 4 5 6 7 8 9 10 11 |
/* -- css -- */ .box1,.box2,.box3,.box4{width: 100%;} .box1{background: #6fb5ff; order: 2;} .box2{background: #b3d874; order: 0;} .box3{background: #ff838b; order: 0;} .box4{background: #ffce5b; order: 0;} .flexbox{ display: flex; } |
上記のように、「box2〜4」は「order: 0;」が設定されているため、1番値の大きい「box1」が後ろに配置されたということです。
このように、「order」を使う際には「初期値は0であること」「値が小さいものから順番に配置されること」、この2つを必ず覚えておきましょう。
orderの値が同じ場合
「order」に同じ値を指定した場合はどうなるのか、先ほどのサンプルコードを用いて見てみましょう。
|
1 2 3 4 5 6 7 8 9 10 11 12 13 14 15 16 17 18 19 20 21 22 23 24 25 |
/* -- html -- */ <header>header</header> <div class="flexbox"> <div class="box1"> <p>box1</p> </div> <div class="box2"> <p>box2</p> </div> <div class="box3"> <p>box3</p> </div> <div class="box4"> <p>box4</p> </div> </div> <footer>footer</footer> |
|
1 2 3 4 5 6 7 8 9 10 11 |
/* -- css -- */ .box1,.box2,.box3,.box4{width: 100%;} .box1{background: #6fb5ff; order: 2;} .box2{background: #b3d874;} .box3{background: #ff838b; order: 2;} .box4{background: #ffce5b; order: 2;} .flexbox{ display: flex; } |
「box1・3・4」に「order: 2;」と指定してみました。
「box2」は先ほど解説したように初期値の「order: 0;」のままですので、先頭に配置されています。
同じ値を指定した3つのボックスは、元々の要素の順番が反映されます。先頭に配置したい要素がある場合などは、この方法を使ってみてもいいかもしれませんね。
orderの応用的な使い方
先ほどのサンプルのように、「フレックスアイテムのひとつを先頭に配置したい」といった場合、「-(マイナス)」を使う方法があります。
それでは、「box2」を「-(マイナス)」を使って先頭に配置してみましょう。
|
1 2 3 4 5 6 7 8 9 10 11 12 13 14 15 16 17 18 19 20 21 22 23 24 25 |
/* -- html -- */ <header>header</header> <div class="flexbox"> <div class="box1"> <p>box1</p> </div> <div class="box2"> <p>box2</p> </div> <div class="box3"> <p>box3</p> </div> <div class="box4"> <p>box4</p> </div> </div> <footer>footer</footer> |
|
1 2 3 4 5 6 7 8 9 10 11 |
/* -- css -- */ .box1,.box2,.box3,.box4{width: 100%;} .box1{background: #6fb5ff;} .box2{background: #b3d874; order: -1;} .box3{background: #ff838b;} .box4{background: #ffce5b;} .flexbox{ display: flex; } |
「box2」のみを先頭に配置することができていますね。
このように、「-(マイナス)」を使うことで、「指定した要素をほかの要素よりも前に配置する」こともできますので、ぜひ色々と試してみてくださいね。
まとめ
いかがでしたか?
今回は、「orderの使い方」について解説してきました。
ぜひ参考にしていただいて、「order」でフレックスアイテムの順番を思い通りに入れかえ、ご自身のホームページやブログなどにも活かしてみてくださいね。
最後まで読んでいただきありがとうございました。
参考文献:MDN web docs|order

